Welcome to Southern Maryland Cooking!

My photo
Southern Maryland is a beautiful piece of country nestled between the Chesapeake Bay and Potomac River. Our area is rich with farmland, Amish and Mennonite communities, farmer's markets, roadside stands, beautiful waterways and seductive scenery. Southern Marylander's are famous for crabs, oysters, rockfish, and "Southern Maryland Stuffed Ham." Although we are very proud of our famous dishes and relish every opportunity to get together to enjoy them, not everything we eat is seasoned with Old Bay. We do eat "regular" food too. :o) Many families have been here for generation upon generation, each of them blessing the next with many treasured recipes. Our region is populated with several military bases, giving us the added benefit of diverse recipe collections. I hope to share with you our true food heritage, our famous recipes, and some of the diversity we've picked up along the way.

Sunday, January 18, 2009

Beef Roast Marsala Dinner (full meal feature)

Beef Roast Marsala Dinner (Electric Roaster)


Roast and Gravy Ingredients:

3-4 pound boneless beef roast

Olive oil

2 1/2 cups Marsala wine

4 cups beef broth

3 medium to large onions (diced)

4-6 carrots (peeled/washed)

Salt

Pepper

2-3 TBSP all-purpose flour

1-2 cups of sliced mushroom (save these for later in the recipe)


Roast and Gravy Spices:

2 Bay leaves

1/2 tsp red pepper flakes

1 tsp thyme

2 tsp rosemary

1 TBSP parsley

1 TBSP chopped basil or basil flakes


Not pictured: mushrooms, green beans, Worcestershire... because... I originally wasn't going to make the gravy, beans, and toast - just the roast... but I changed my mind. I changed my mind because I'm a woman. It's my right. Please don't hate me.

Roasted Fresh Green Beans – Ingredients:

1/2 - 1 LB Fresh green beans – or enough to fill your serving dish

1 TBSP olive oil

1 TBSP butter

1 TBSP Worcestershire sauce

Salt

Garlic pepper


Preheat the roasting pan to 375 degrees.


Heat a large skillet and add 2 TBSP olive oil.


Dust all sides of the beef with salt, pepper, flour.


When the oil is hot (not smoking), add the beef to the skillet.


Brown the beef on all sides 1-2 minutes each side.


Flip that baby...


Add roughly 3 TBSP of olive oil to the preheated electric roasting pan.


Add chopped onion...


and carrots...


I like big random hunks of carrots in this recipe because I love the way they hold their shape and retain their flavor and firmness. I hate soggy, mushy carrots.


Stir.


Add all of the dry spices to the onions/carrots and stir again.


Make a space for the beef in the center and add the browned beef roast to the roasting pan.


Pour ½ cup of Marsala in the skillet to deglaze, being sure to stir and scrape the bottom of the skillet to remove all of the brown bits of beefy flavor from the bottom.


Bring it to a boil and stir very well, continuing to get every bit from the bottom of the skillet.


Remove from heat and pour into roasting pan.


Pour 2 cups of Marsala in Roasting pan, followed by 4 cups of beef broth.


Top with a good sprinkling of salt and pepper. Cover the roasting pan.


If you would like to serve roasted green beans with your meal, lay two-three sheets of aluminum foil on the countertop. Top the foil with washed and trimmed green beans.


Drizzle with olive oil and Worcestershire sauce. Top with 1 TBSP butter. Sprinkle with salt and garlic pepper. Bring the foil up and fold the edges over tightly. Roll the foil down to form a sealed pocket, leaving some room for steam to build inside the pocket.


Open the roasting pan and set the foil pouch inside on top of the carrots, onions and sauce.


Cover the roasting pan and cook at 375 degrees for 30 minutes, then reduce the heat to 225 and continue to cook another 1 ½ to 2 hours.


Go do something. Set the table, fold napkins. Put your feet up. Check your email. Leave the roasting pan alone. Do not lift the lid. Lifting the lid on your electric roaster will increase the cooking time or worse, dry out your roast.


Remove the roast from the pan when the internal temperature reaches 140-145 degrees with a meat thermometer for medium, or 150-160 for well done. Return the lid to the roasting pan to cover the veggies and juice.


Lay the roast on sheets of aluminum foil and drizzle about ¼ cup of juice from the roasting pan over the roast. Wrap the roast with aluminum foil and let it rest.


The roast needs to rest for at least 15 minutes, so let’s make Beefy Mushroom Marsala Gravy.


In a hot skillet, add 1 TBSP butter.


Add mushrooms and sauté until desired doneness is achieved.


Remove mushrooms from pan and set aside for now.


Remove pouch of green beans from roasting pan and set aside. Keep them wrapped until ready to serve.


With a slotted spoon, remove carrots and half of the onions from the roasting pan. Ladle them right into the serving dish and cover to maintain warmth.


Add 2 TBSP butter into the same hot skillet. (Shush, my thighs. It simply must be done. It must be done for Marsala gravy. Amen.)


Once the butter is melted, add 3 TBSP all-purpose flour and stir quickly to form a roux. Pour all of the remaining juice and onions from the roasting pan into the skillet, stirring to avoid the creation of lumps. (I would have loved to have shown you the roux but I didn't get a picture of it thanks to teenagers and car keys).


Carefully remove the bay leaf. Simmer and stir until your desired gravy consistency has been reached. (I wish you could smell this. I just wanna eat this with a spoon!)


Add the mushrooms back into the skillet and stir. Remove from heat.


Stop for just a moment and repeat after me: "Dear Lord, Thank you for this gravy. Amen."

Set the table with carrots, mushroom gravy, and green beans. Unwrap the roast and slice. Move to serving platter and pour the juices from the aluminum foil wrapper over the slices. Serve. Mmmmm, you can cut this with a fork!


When I make this, I also like to toast slices of pumpernickel or pumpernickel & rye bread in the oven. To do this, preheat the oven to 375 degrees. Lightly brush slices of bread with olive oil and sprinkle with a light dusting of garlic pepper. Bake for 5-10 minutes until desired level of toasting has been reached. Serve.


Enjoy!

Sunday, December 28, 2008

Turkey Pot Pie

Turkey Pot Pie

2 TBSP butter or olive oil

1-2 cloves of minced garlic

1 small onion diced

1 large carrot diced

1 stalk celery diced

1-2 cups of diced leftover turkey (can use chicken instead)

1 can mushrooms (optional)

1 can cream of chicken soup

1 cup chicken or turkey stock

2 TBSP flour

¼ cup milk

1 pre-made pie shell (the kind that you un-roll and put in your own pie pan)

Thyme

Poultry seasoning


Heat butter or olive oil in cast iron skillet. Add garlic, diced carrots, celery and onions. Saute for about 4 minutes.


Add chopped turkey leftovers and mushrooms. Heat an additional 3-4 minutes.


Season with thyme and poultry seasoning. I put about 6 shakes of each in. (you can taste test and adjust to your liking)


Pour in one cup of chicken or turkey stock and one can of cream of chicken soup. Stir well and allow to simmer until heated through.


In a separate bowl or cup, whisk the flour and milk. Quickly add the flour mixture to the cast iron pan and stir, stir, stir. Once the desired thickness has been achieved, remove from heat.


Unfold one pie shell over top of the cast iron pan. Place pan in the oven and bake for 30-35 minutes or until pastry is nicely browned. Remove from oven and serve.

Monday, December 1, 2008

Hot & Creamy Chicken and Pimento Cheesy Dip

Every once in a while I get a wild inkling to create something out of the leftovers.

This was something I threw together on a day that I was working my butt off on homework. I needed BRAIN food in a hurry! I went to the fridge and spied the leftover island mango chicken breast from the previous night's dinner. Hmmmmmm I should probably eat meat and not graze on junk food all day. But I have a problem with meat hurting my stomach, so it has to be super moist. 
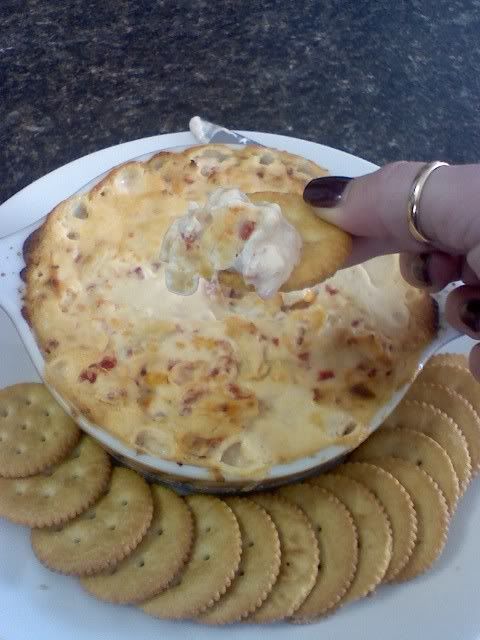
What can I do with this? I spied the cream cheese... I spied pimentos.... and here's what I ended up with:


Hot & Creamy Chicken and Pimento Cheesy Dip

1 large (cooked) chicken breast - diced
1 block of cream cheese softened
1/2 cup of shredded cheddar cheese
1 small jar of pimento's drained
1 teaspoon of prepared horseradish
2 Tablespoons sour cream
2 Tablespoons milk

I mixed the softened cream cheese, milk, sour cream and horseradish until nice and creamy... then mixed in all the other ingredients. Put it all in a small baking dish and baked at 375 for about 30-40 minutes - until hot and bubbly and slightly browned on top.

YUMMY!!!!

Is it fatting? Probably if you eat alot of it.... but so was that box of boston cream donuts sitting on my kitchen counter.... so I feel like I made a better choice anyway....

You can eat it on celery sticks, cucumber slices, pepper slices, crackers, little toasted breads, on a sandwhich, or just plain eat it with a spoon. You could even hollow out some tomatoes, stuff the tomatoes, top with bread crumbs and cheese and bake it that way and gobble it up. I'm definitely feeling creative today.

If i had some water chestnuts, I would have thrown them in there too. I just like the crunch they add.

Speaking of gobbling it up - I wonder if leftover turkey would work in this one? Hmmmmm....

Sunday, November 30, 2008

Biscuits for a Crowd

Makes about 45-50 Biscuits (depending on the size you cut 'em)
  • 8 cups all-purpose flour
  • 1/3 cup baking powder
  • 1/4 cup sugar
  • 2 teaspoons salt
  • 2 cups very cold butter
  • 4 eggs
  • 2-2/3 cups milk

DIRECTIONS

  1. In a large bowl, combine the flour, baking powder, sugar and salt. Cut in butter until the mixture resembles coarse crumbs. One handy trick is to freeze the butter and grate it or you can use a knife to cut it into smaller chunks. The colder it is, the flakier the biscuits. If you're worried that your butter got too warm while mixing it, simply place the bowl in the fridge for a few minutes.
  2. Beat egg with milk; stir into dry ingredients just until moistened. It should look soupy and gloppy. (heavy duty terminology there!)
  3. Turn onto a well-floured surface; sprinkle flour all over the top. Pat the mixture gently to form a rectangle. Carefully, fold the rectangle like a tri-fold letter. Sprinkle with a little more flour if it gets sticky. Form it into a rectangle with your hands again and repeat the tri-fold. And do it one more time. In other words, you will form a rectangle three times and fold it into a tri-fold letter three times.
  4. Roll to 3/4-in. thickness; cut with a floured biscuit cutter. I use a drinking glass or an old jelly jar. Arrange the biscuits on the baking sheet so that the sides are touching. Bake at 450 degrees F for 8-10 minutes or until golden brown. Serve warm.
These make yummy sandwich biscuits! Also, a note on the butter: you can use one cup shortening in place of the butter OR you could even use half butter/half shortening. Just make sure it's cold.

Don't need to feed a crowd? Just a family?

Here's the family size ingredient list (mixing/prep instructions are the same):
  • 2 cups all-purpose flour
  • 4 teaspoons baking powder
  • 3 teaspoons sugar
  • 1/2 teaspoon salt
  • 1/2 cup butter (1 stick)
  • 1 egg
  • 2/3 cup milk

  • All I want for Christmas is you...

    Oh baby.... come to mama!


    THE KITCHENAID 600 -

    6 Quart Stand Mixer in Nickel Pearl Grey


    Isn't that the most beautiful thing you have EVER seen? *sigh*


    6 qt. Professional 600™ series model mixer with 575 watt motor


    Mixes up to
    14 cups of all-purpose flour per batch


    Soft Start™ speed helps prevent splattering with a slower beginning speed
    Multi-purpose attachment hub powers optional attachments to simplify food preparation
    Electronic speed sensor monitors operation
    67 point planetary mixing action for quick, complete mixing
    PowerKnead™ spiral dough hook, flat beater and wire whip included
    10-speed control from very high to a very slow stir
    Churns through yeast bread dough and triple batches of cookie dough.

    Monday, November 17, 2008

    Homemade Chicken Noodle Soup - Magic in a pot!


    Yummm!  Homemade Chicken Noodle Soup!!

    Between working full-time in a busy office, parenting a crew of "young adults" (21, 20, 19, 16) and a 9 nine year old little man, raising a feisty little Jack Russell named Lucy, trying to pay attention to my husband, cooking, homework, cleaning (AUGH! "Calgon take me away" as the commercial says!)  I am incredibly busy - all the time!  I know, who isn't, right?  Well, sometimes this means ordering food on the run, a lot of "fend for yourself" nights, and just overall stress trying to get everyone fed something healthy and home cooked while meeting all of the demands of the day.  So whenever life allows it, I try to stock up on some home cooked meals that are quick grabs during the work week.

    Now, making this chicken noodle soup is not quick by any means.  This one takes a little work but I assure you... I promise you... it is well worth it!  This soup has been known to heal marriages, bring back that lovin' feeling, shorten the duration of the common cold and other "feeling ucky" ailments, and make everyone you love and miss come flocking to your kitchen to give you hugs, praises and smiles.  No kidding.  It's that good.

    Today's Accomplishments:

    • Reserved 1 quart homemade chicken stock to keep in the freezer for future recipes
    • Stored two large containers of homemade chicken noodle soup in the freezer
    • Stored four serving size portions of chicken noodle soup in the freezer for quick one-person meals
    • Stored one large container of homemade chicken noodle soup in the fridge for tomorrow
    • Made every member of my household come emerging from their respective corners, pulling themselves away from video games, the computers, from the phone, from texting, from sleeping in the recliner, from watching t.v., from playing around outside - from everywhere - to the kitchen where they all said "Oh my God that smells so good!" while they looked around with eyes like saucers trying to find the goods.
    • Made my husband treat me like a newlywed - he kept telling me how beautiful I was, putting his arms around me, and looking over my shoulder into the pot to see how it was coming.  He also kept telling me "God, you are a good woman." and "I'm the luckiest man alive." (I'm telling you, this stuff is powerful!)

    You are probably sick of me rambling by now, if you are still here.  So I guess I better tell you how it was done... let's get cookin'!  


    Ingredient List 1 (starting the broth):

    3   TBSP butter

    2   TBSP minced garlic

    2   medium onions, peeled and quartered

    5-6   stalks of celery (just using the ends/tops in this section)

    5-6   carrots (just using the tips/bottoms in this section)

    1 1/2   gallons water

    1 3-5   pound whole chicken

    1   TBSP salt

    1   very large pot

    Ingredient List 2 (Make the soup!):

    2-3   medium onions, peeled and chopped

    8      chicken bullion cubes

    2-3   TBSP poultry seasoning

    1       TBSP Thyme

    1-2   TBSP Salt

    1-2    tsp pepper

    5-6   stalks of celery (using the middle parts in this section)

    5-6   carrots, peeled/sliced (using the middle parts in this section)

    Noodles – At the very end!


    You will need a very large pot.  I used my 22 quart canning pot.  In this section, don't worry about how pretty the vegetables are cut because you are going to strain them out and toss them.  At this point, they are being used to flavor your broth.


    Start the BROTH

    1. Add 3 TBSP butter to pot.  Turn the pot on medium heat.  
    2. Add about 2 TBSP of minced garlic to the butter.  
    3. Peel and quarter 2 medium onions and add to the pot.  Stir it around a bit.
    4. Cut the tops and bottoms off of 5 or 6 stalks of celery.  Rinse the celery and add to the pot. 
    5. Cut the tops and tips off about 5-6 carrots, rinse and add them to the pot.  
    6. Reserve the remainder of the celery and carrots for later.  
    7. Stir this around for about 3-5 minutes.  
    8. Add 1 1/2 gallons of water to the pot.
    9. Wash one whole chicken in cold water, remove innards, wash inside and out.  Add whole chicken to pot.
    10. Open the pouch of innards, rinse with cold water and add to the pot.
    11. Leave the pot on the stove cooking at a simmer, not a boil and WALK AWAY.  This is going to cook for 3-4 hours.  

    See how the chicken is sunk to the bottom when you start out?

    Before I made it to step eight, four members of my family came looking for me in the kitchen to find out what it was and wanted to know if they could eat it right now.  


    After about 3-4 hours, your chicken should be done.  In fact, it should be floating to the top by now and beginning to fall off the bone.  Perfect! 


    See how the chicken rises to the top after it's cooked?

    1.  Very carefully, remove the chicken from the pot and set aside. 
    2. Strain all the veggies from the pan, leaving only the broth (toss the veggies you removed from the pan). 
    3. Let the juices in the pan settle for a few minutes so all the fat/oils float back to the top.  Use a ladle to gently push down around the edges on top of the broth to remove the layer of fat/oils.
    4. While the chicken is cooling a bit, add 5 or 6 peeled sliced carrots, 2-3 medium (peeled/chopped) onions, 6 stalks of celery (sliced). 
    5. Add 8 bullion cubes to the broth (we are making a LOT here).  Add 2-3 TBSP poultry seasoning, 1-2 TBSP salt, 2 tsp pepper, 1 TBSP thyme.
    6. Cook at a simmer until the vegetables are fork tender.
    • A note on seasoning:  Start out with half of the seasoning called for in the recipe.  Put a little of the broth in a dish and do a taste test.  If you think it needs more, gradually add more, repeating the taste test until your tongue is doing a happy dance in your mouth.
    • ** A note on how to cut the vegetables:  My daughter always asks me "how do you want them cut?" and my answer is "Imagine this food on your fork or spoon and cut it to the size you would like to eat."  It's that simple.  So cut yours however you like it.  We like ours country style, meaning slightly large uneven chunks.

    At the very end:

    1  16 ounce package noodles of your choice

    Add package of noodles to pot and cook until done to your liking.

    I used a brand called “Grandma’s homestyle noodles” (found at Walmart), and so far I think they are the best I’ve tried.  Often times, I will make dumplings and drop them in.  Since I found these noodles, I make dumplings less often.  Another trick, in place of pre-packaged noodles or homemade dumplings, is to use a can of flakey biscuits.  Cut the biscuits in half or quarters, then peel some of the layers apart, and drop them in.  Don’t stir them or they will dissolve.  Drop them in and walk away for about 10 minutes, come back and use the back of your spoon to push them down and walk away again for another 10 minutes – keep doing this until you are happy with what it looks like.


    Saturday, November 8, 2008

    Deep Dish Cream Cheese Danish


    Deep Dish Cream Cheese Danish

    2 cans crescent rolls

    2 8 oz. blocks cream cheese (softened)

    1 cup sugar, plus 1 TBSP for later

    1 stick of butter (softened)

    1 tsp vanilla

    1 tsp cinnamon, plus ½ tsp for later

    Spread one can of rolls in the bottom of a 9x9 square baking dish.  It doesn’t have to be perfect but try to lay them so you can’t see the bottom of the pan peeking through.  It’s ok to overlap them.  Really.  It is. 

    Mix 2 blocks cream cheese, 1 stick of butter, 1 tsp vanilla, 1 tsp cinnamon and 1 cup sugar.  Beat well. Give the beaters to your favorite 9 year old.  :o) smile.

    Spread half the mixture over rolls.  Spread the other can of rolls on top of the cream cheese mixture.  Spread remaining mixture on top. Mix 1 TBSP sugar and ½ tsp cinnamon together and sprinkle all over the top. 

    I had plenty of crescent rolls in my pan, so I kept two pieces out and saved them to lay on the top.

    Pause.  Take a minute to reassure yourself that you are NOT going to eat the whole pan, therefore it’s ok.  It’s O – K!

    Bake at 350 degrees for 35 minutes.  Allow to cool for about 10-20 minutes so it sets up well.


    Variations

    • Replace Vanilla with Maple flavoring or Almond extract or Butter Rum extract or whatever flavoring you’d like to try. When I make these with maple flavoring, my kids like to drizzle a little maple syrup over them at the table.
    • Replace Cinnamon with pumpkin pie spice or mulling spice or whatever you would like to try.
    • Instead of splitting the cream cheese mixture into two layers, you can spread the entire mixture over the bottom layer of crescent rolls, then top with the other can of crescent rolls.  If you do it this way, omit the butter from the cream cheese mixture.  After you top the cream cheese layer with the second can of crescent rolls, pour the melted stick of butter all over the top and then sprinkle your cinnamon/sugar mixture (or whatever you pick) over the top and bake.